Launching Matillion ETL using an Amazon Machine Image🔗
This guide explains how to create a Matillion ETL instance using Maia, launching on AWS via Amazon Machine Image (AMI).
This document is part of a series on the Matillion ETL instance creation process.
Note
Once you have created and logged into your Matillion ETL instance, you need working instance credentials to run most tasks (for example, executing jobs and running Python scripts). Read Manage Credentials to learn more about credentials.
Prerequisites🔗
Prior to launching a Matillion ETL instance, you'll need to register for a Maia account. You will also require:
- A user with admin permissions who can access the intended cloud service account.
- Access to a cloud storage bucket (Amazon S3, Azure Blob Storage, or Google Cloud Storage) to house the transient staging files Matillion ETL uses to load data to the cloud.
- A network path to access the intended data sources. This may involve working with your network team to enable access to on-premises databases.
Launching Matillion ETL using an Amazon Machine Image (AMI)🔗
Amazon EC2 allows you to create virtual machines or instances that run on the AWS cloud. Use the following steps to access Maia to create and launch a Matillion ETL instance through AWS, using AMI:
-
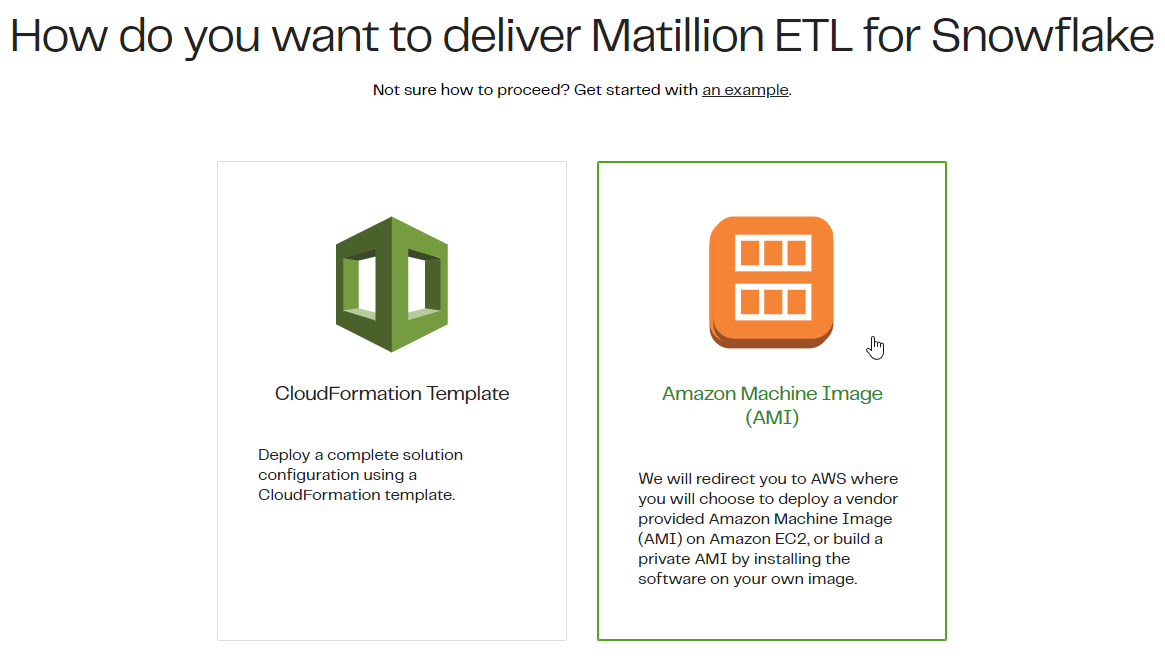
Sign in to the Maia. Follow the steps in Matillion ETL Instance Creation. Make sure you select AWS as your cloud provider, and Amazon Machine Image (AMI) when you choose how you want to deliver your Matillion ETL instance, and continue to follow the upcoming steps in Maia.
-
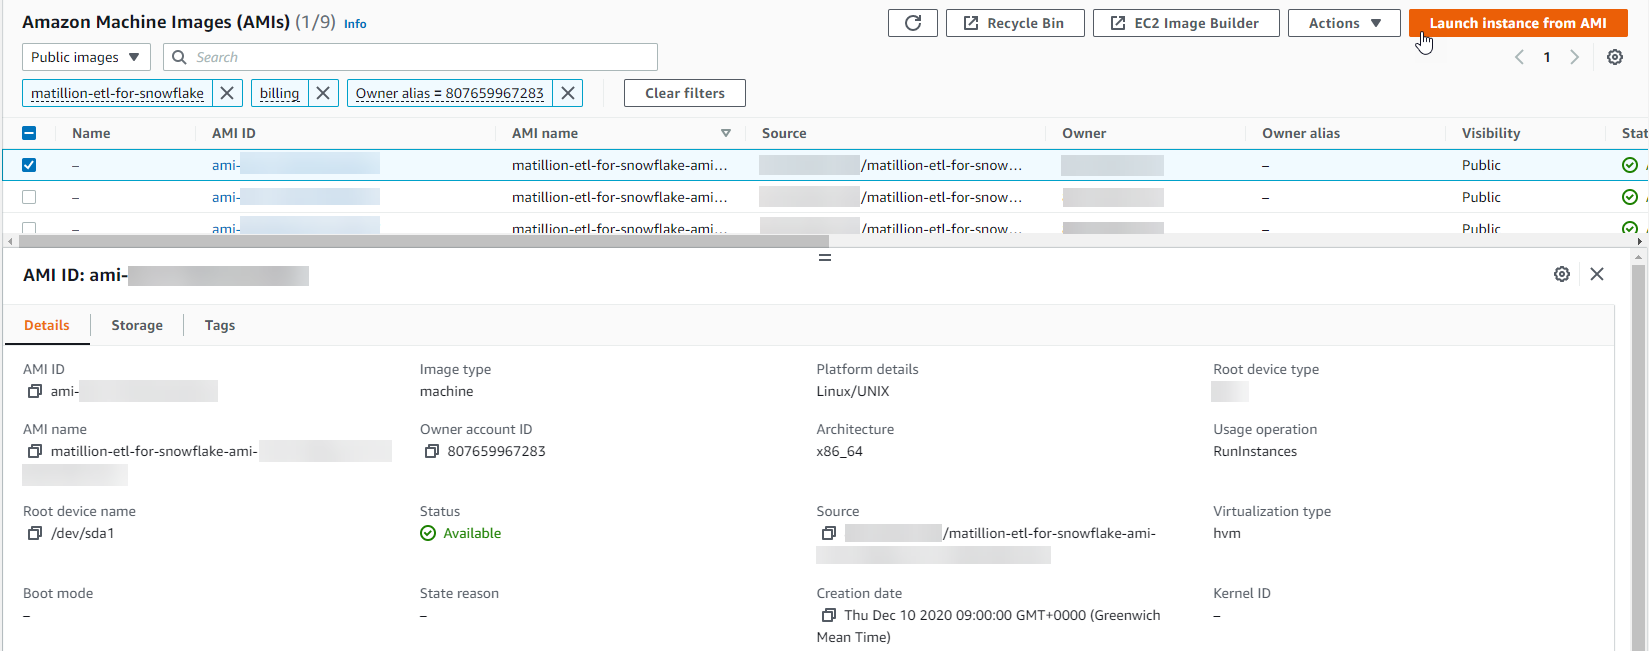
Click Continue in AWS to be redirected to your AWS account. Based on your selections you made in Maia earlier, the system will pre-populate the AMI with the preconfigured details required to launch your Matillion ETL instance. Select your AMI from the list displayed, and click Launch instance from AMI.
Note
If choosing from a list of AMIs, use only AMIs with
billingin the Matillion ETL instance name, and not ones that are namedbring your own license (BYOL).Warning
Beware that AMIs aren't necessarily listed in order of recency. Take care when selecting the desired version.
The browser will redirect you to Launch an instance. Scroll down the page and complete the following sections:
- Name and tags will be the first section you are required to complete. A tag is a label that you assign to an AWS resource. Each tag consists of a key and a value, both of which you need to define. Click Add additional tags to define the Key, Value, and Resource types of your tag. For example, you could define a tag with
Key = NameandValue = web server. - Scroll down to Application and OS Images (Amazon Machine Image). An AMI is a template that contains the software configuration (operating system, application server, and applications) required to launch your Matillion ETL instance. Use the Search bar or Browse for AMIs if you don't see what you're looking for.
- Use the drop-down to select an Instance Type. You can compare instance types to help inform your decision. For more information, read the Instance Sizes guide.
- Scroll down the page until you reach Key pair (login). Use the drop-down to select a key pair to securely connect to your Matillion ETL instance. You must make sure you have access to the selected key pair before you launch the instance. To create a new key pair if you haven't already done so, click the Create new key pair button. For more information on creating a key pair, read Create key pairs.
-
Some of the details in the Network settings section will automatically be set up, but you can edit the following information:
- VPC: Use the drop-down to select the VPC you want to launch your instance into. The availability zone this VPC is located in should be the same as your Snowflake account (European Snowflake accounts should be paired with an EU-based AWS region, for example).
- Subnet: Use the drop-down to select the subnet in which the network interface is located. Each subnet resides in one availability zone. To create a subnet, click Create new subnet. For more information, read Create a subnet in your VPC.
- Auto-assign public IP: Use the drop-down to select whether a public IP address is automatically assigned to the primary network interface of the instance. By default a new VPC will not have VPN connections or NAT Gateways available, so for Matillion ETL to connect to the internet, and for you to access Matillion ETL, this option will need to be set to Enable.
- Firewall (security groups): Select one out of two options: Create security group or Select existing security group. A security group is a set of firewall rules that control the traffic for your instance. Add rules to allow specific traffic to reach your instance. A default security group will be created with the minimum set of ports. Provide a security group name and adjust the settings of your security requirements, if needed. For more information, read Security group basics.
Note
The default recommended security group uses SSH (port 22) and HTTP(S) (port 80 and 443) to access your Matillion ETL instance. The range of allowed IPs should be tailored to your needs.
-
Scroll down the page to reach the next section, Configure storage. Specify the storage options for your instance. You have the option to complete the Simple or Advanced storage settings.
-
Complete the Advanced details section. Some of these options require additional information before you proceed. It's worth noting the following:
- Purchasing option: Request Spot Instances at the Spot Price, capped at the On-Demand price. Leave the Request Spot Instances checkbox cleared. However, if you require more information, read Spot Instances.
- IAM instance profile: IAM roles are used to allow your instances to use the Amazon API securely, without manual management of security keys. To use all the features of Matillion ETL, you should configure an IAM role for your instance to use. This procedure assumes you do not already have an appropriate IAM role setup (if you do, simply select it using the drop-down). For detailed information on creating IAM roles, read IAM Roles and Permissions (AWS).
- Shutdown behavior: The instance behavior when an OS-level shutdown is performed. Instances can be either terminated or stopped. If no value is specified the value of the source template will still be used. If the template value isn't specified then the default API value will be used. Use the drop-down to select Stop.
- Termination protection: If enabled, the instance can't be terminated using the console, API, or CLI until termination protection is disabled. If no value is specified, the value of the source template will still be used. If the template value isn't specified, then the default API value will be used. Use the drop-down to select Enabled.
- Tenancy: Dedicated tenancy instances run on single-tenant, dedicated hardware. Host tenancy instances run on a dedicated host. If no value is specified, the value of the source template will still be used. If the template value isn't specified, the default API value will be used. Use the drop-down to select Shared - run a shared hardware instance.
-
A Summary of your instance configuration will be displayed at the top-right of the Launch an instance page. You have the option at this stage to specify more than one instance to launch. All the instances will launch with the same configuration. Review your configuration settings, and click Launch instance.
-
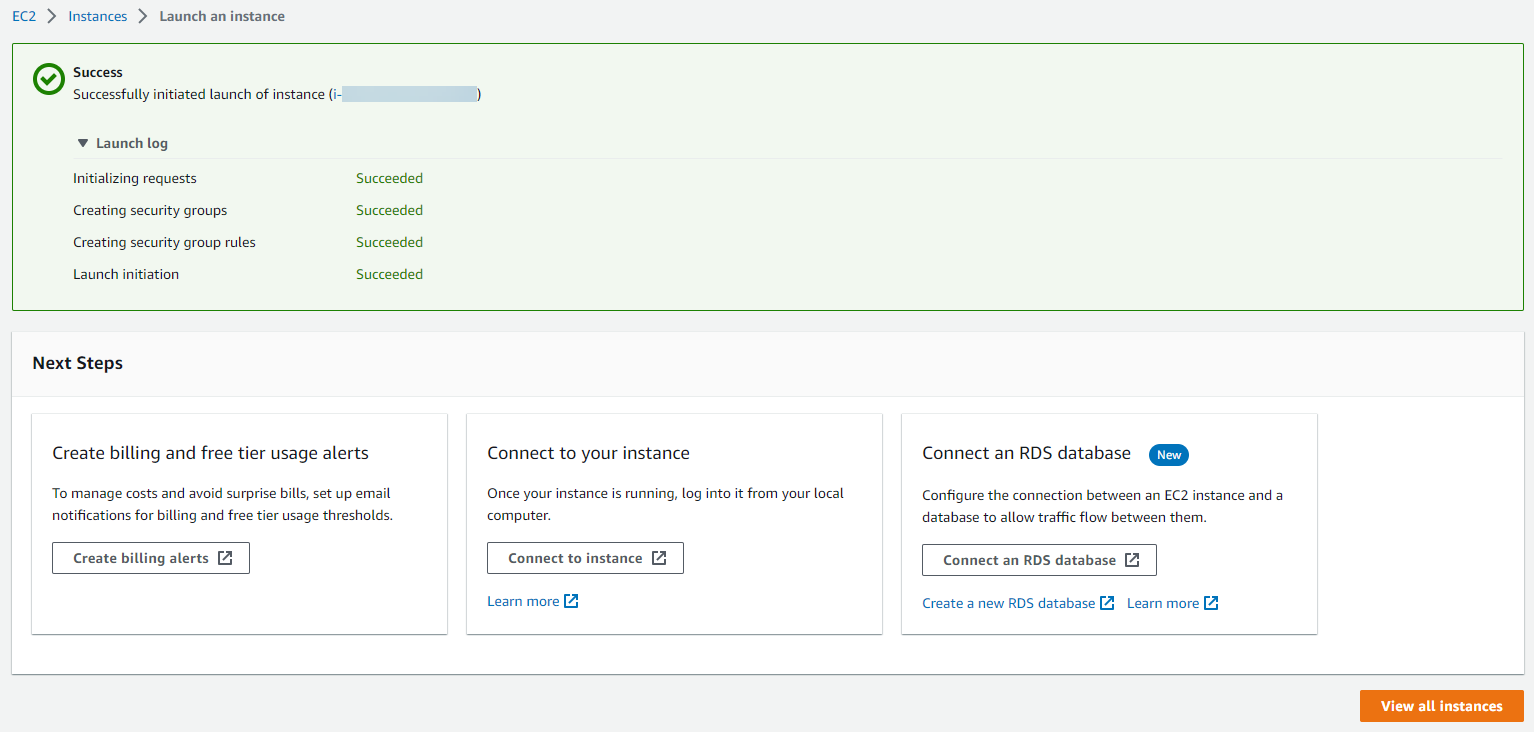
Your instance will begin initiating and may take a while to launch. You will be redirected to a new page where you can click Launch log to monitor the status of your instance. When your instance has launched, a message will appear at the top of the page, with a Success status, and a link to your newly configured instance.
Note
Next Steps will appear on the Success page, where you will see useful links for creating billing and free tier usage alerts, guidance on connecting to your instance, and connecting an RDS database. If you have created multiple instances, click the View all instances button at the bottom of the page.
-
Log in to Matillion ETL with the username ec2-user and the instance ID i-xxxxxxxx (for example i-88ed92c6) as your password.