Registration🔗
Anyone wanting to become a user of the Data Productivity Cloud is required to register for an account to gain full access to the services on offer. This section explains how a new customer can register for a Data Productivity Cloud account.
Registering for a Data Productivity Cloud account🔗
Follow these steps to register for a Data Productivity Cloud account:
-
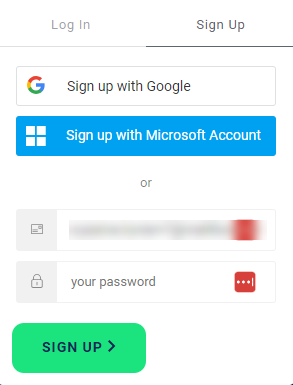
Access the Data Productivity Cloud, and click the Sign Up tab. Enter your company email address, choose a password, and click SIGN UP. Alternatively, if you wish to sign in with your existing third-party identity provider instead of using a password, click the relevant button for your provider.
Note
You must provide your company email address when you register with the Data Productivity Cloud. You cannot register using your personal email address.

-
If you have signed up using a password, you will receive an email. Follow the prompts to check your email, then verify it by clicking Activate account. You will be redirected back to the Data Productivity Cloud, where you will automatically be signed in. If you have used a third-party identity provider, no email is necessary, and you can progress to step 3.
- To create your Data Productivity Cloud user account, the Create your profile page will be displayed. Enter the details requested and optionally a phone number, and if you want to receive news, events, and promotions via email. Click Continue.
- Three tabs will appear. In the first one called Create your profile, use the drop-down menu to select What brings you to Matillion today? In the second drop-down menu, you are asked What cloud data platforms do you use? Select all that apply. Click Continue.
- In the second tab called Set up your account, select the region where you want your Matillion account to be created. For more information, read Account regions in Create an account. Click Continue.
- When you click Continue, the Getting Started tab will take you to a new page, where you're required to select a data platform. Choose to either use a Matillion trial warehouse, where there is no setup required, or connect to your own data platform. Choose from Snowflake, Databricks, or Amazon Redshift.
- Your warehouse and account are being set up. This may take several minutes. Remain on this page while they're being configured. The Designer interface will open. For more information, read Designer overview.
Note
It's recommended that you invite a second admin user to join the account after you have created it to create redundancy and reduce the risk of losing access to the account. To invite another user to your account, read Manage other users.
Now that you're a registered user of the Data Productivity Cloud, you will automatically be enrolled in the 14-day free trial. For more information, read Free trial.
Note
When you create an account you will be assigned the Super Admin role for that account, granting you access to all projects and environments within it. These permissions can be modified later. To do this, read Edit user roles.
A short video explanation is also available: Getting started with the Data Productivity Cloud.