Salesforce Output authentication guide🔗
Overview🔗
This is a step-by-step guide to creating an OAuth entry, acquiring credentials, and authorizing the Salesforce Output component for use in Matillion ETL.
Note
- The Salesforce Output component uses either a username and password or an OAuth for third-party authentication. This guide only explains the OAuth method.
- While component properties may differ between cloud data warehouses, the authentication process remains the same.
Creating an OAuth entry in Matillion ETL🔗
-
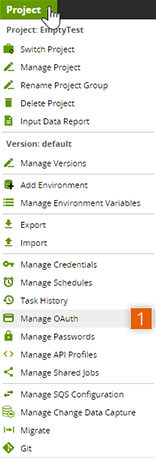
In Matillion ETL, on the top left of the screen, click Project → Manage OAuth.
Note
If a Salesforce Output component has already been added to an Orchestration Job, the Manage OAuth window can also be accessed using the following method:
- Click the component icon to open the Properties panel at the bottom of the screen.
- Click ... next to the Authentication Method input, and select OAuth from the drop-down.
- Click ... next to the Authentication input, and click Manage in the pop-up window.
-
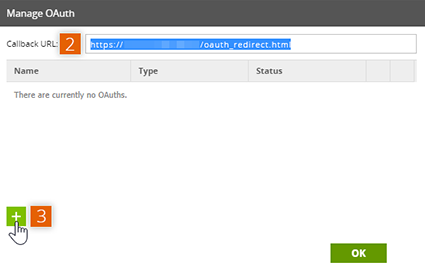
Copy the Callback URL in the field at the top of the window, as this will be required when acquiring third-party credentials.
-
Click + in the bottom left of the window to open the Create OAuth Entry window.
-
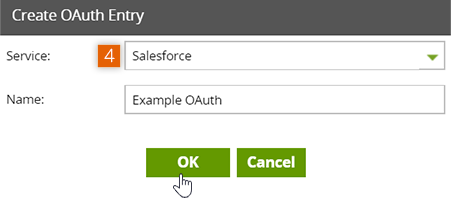
Click the Service drop-down and select Salesforce. Provide a name for the OAuth in the Name field and click OK.
-
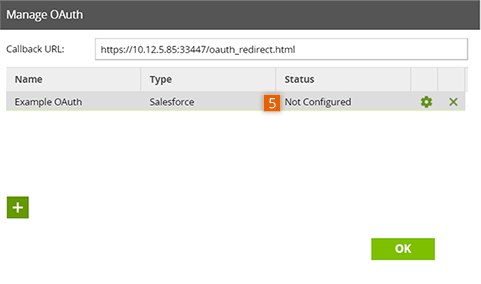
On returning to the Manage OAuth window, check the list of OAuths to ensure the new entry is listed.
Note
This entry is Not Configured. Configuration of the OAuth entry is covered in Authorizing for use in Matillion ETL.
Acquiring third-party credentials🔗
-
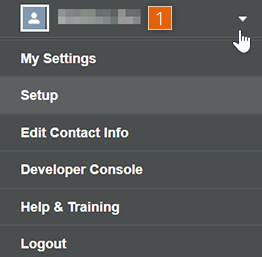
Navigate to the Salesforce Output website. Enter valid login credentials to continue. The browser will then redirect to the Salesforce Output landing page. Click the account drop-down next to your Account name on the top-right corner of the page, then click Setup from the drop-down.
-
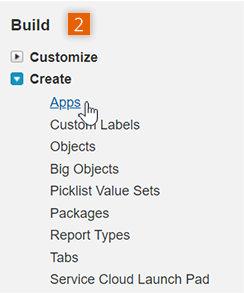
The browser will redirect to the Setup page. Scroll down on the left to the Build section and click Create → Apps on the sidebar to open the Apps window.
-
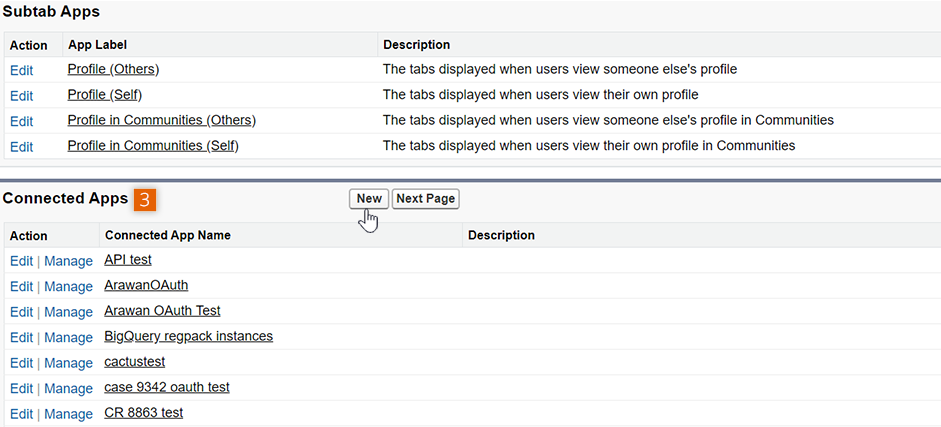
In the Apps window, scroll down to the Connected Apps section and click the New tab to open the New Connected App window.
-
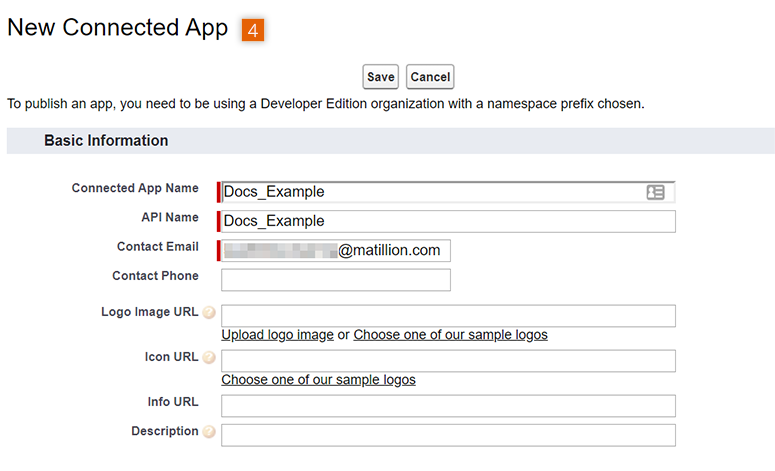
In the New Connected App window, provide the details required in the Basic Information and API (Enable OAuth Settings) sections.
-
Fill in the required fields of the Basic Information section:
- Connected App Name — provide a name for the app to be connected.
- API Name — provide a name for the API.
- Contact Email — provide the email address to be connected.
-
Fill in the required fields of the API (Enable OAuth Settings) section:
- Enable OAuth Settings — select the checkbox to enable the OAuth settings.
- Callback URL — paste the Callback URL copied earlier from the Manage OAuth window in Matillion ETL.
- Selected OAuth Scopes — select the required OAuth scopes from the list of available scopes:
- Access and manage your data (api)
- Provide access to your data via the Web (web)
- Full access (full)
- Perform requests on your behalf at any time (refresh_token, offline_access)
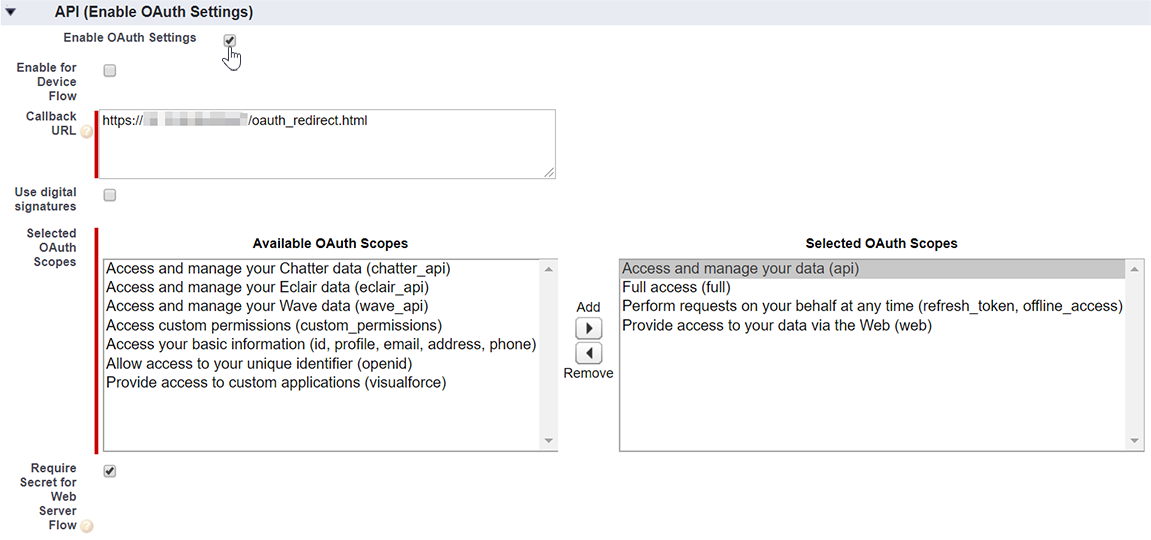
Once you have completed all the details, click Save.
-
-
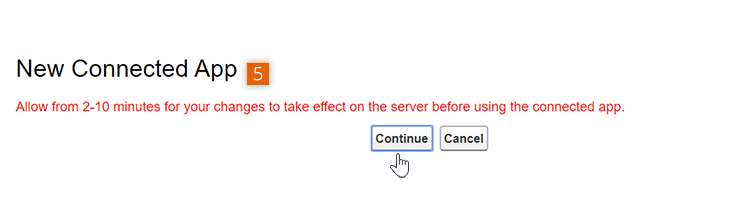
The browser will redirect to the New Connected App window once again, with a message stating "Allow from 2-10 minutes for your changes to take effect on the server before using the connected app". Click Continue on the window.
-
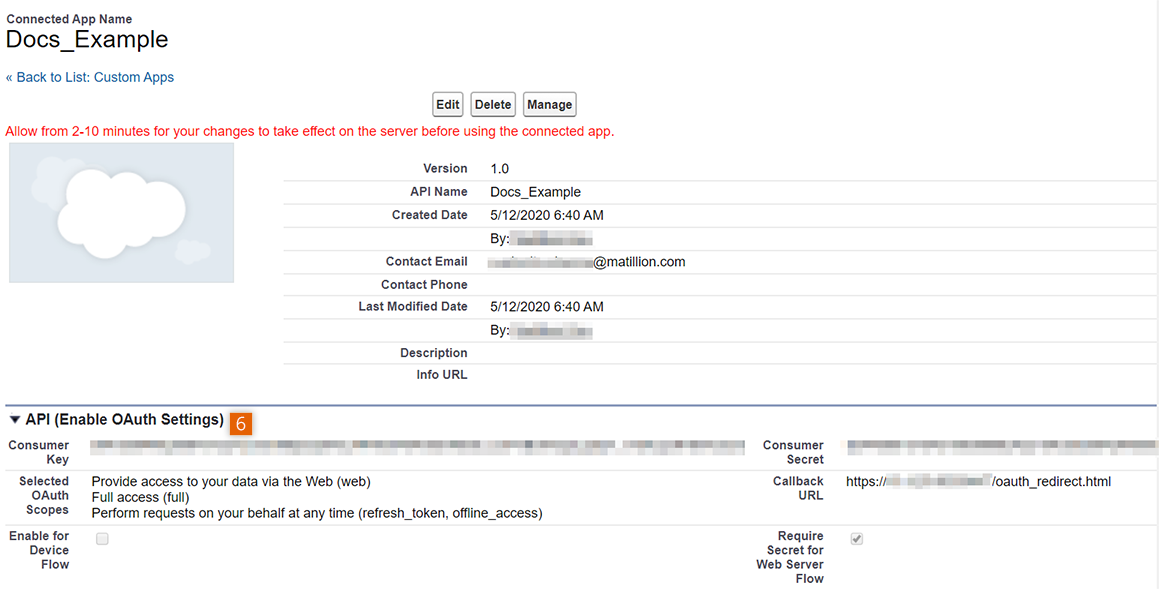
The browser will return to the app window you created, with the codes. Scroll down to the API (Enable OAuth Settings) section and copy the codes next to Consumer Key and Consumer Secret, as they will be required when authorizing for use in Matillion ETL.
Note
- Before the Consumer Secret can be copied, click Click to reveal to make it visible.
- Copy the Consumer Key and Consumer Secret values. You might not be able to retrieve them after you perform another operation or close this blade.
- Additionally, when copying the codes, some browsers may add a space to the end of the string. Watch out for this, as it will cause the credentials to fail.
Authorizing for use in Matillion ETL🔗
-
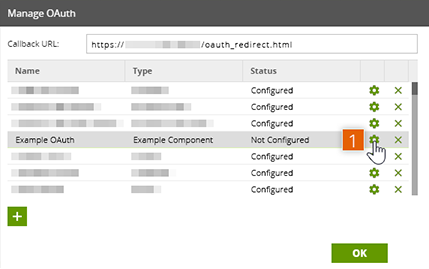
Return to the Manage OAuth window in Matillion ETL and click ⚙ next to the previously created OAuth entry. This will open the Configure OAuth window.
-
On the Configure OAuth window in Matillion ETL, provide the details for the following fields:
- Client ID — provide the Consumer Key copied earlier from the Salesforce Output website.
- Client Secret — provide the Consumer Secret copied earlier from the Salesforce Output website, then click Next.
- Use Sandbox — select No if you are using a real environment, or select Yes if you are using a sandbox environment for OAuth.
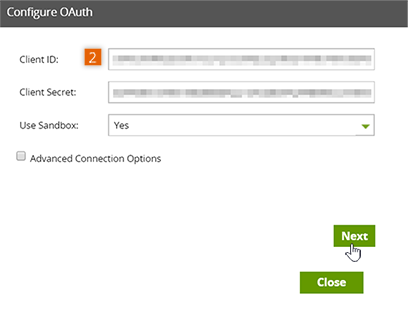
-
The next window will have an Authorization Link. Click this link to authorize Matillion ETL to use the acquired credentials.
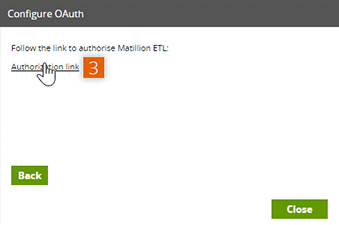
-
The Salesforce Output Sign In page will appear immediately. Click Sign In on the screen. The browser will then redirect to a Salesforce Output screen requesting confirmation of the permissions associated with the app. Click Allow to confirm.
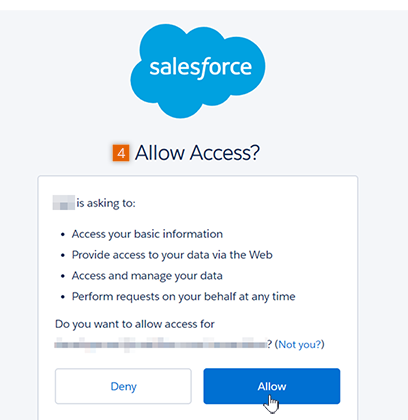
-
If all is successful, the browser will return to Matillion ETL with a window stating Authorization Successful.
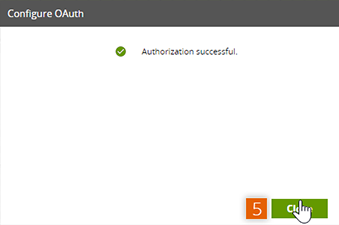
Acquiring third-party credentials for OAuth (Client Credentials)🔗
The OAuth (Client Credentials) authentication method doesn't need a Matillion ETL OAuth entry, Callback URL, or interactive browser sign-in. Instead, enter the Client ID, Client Secret, and Login URL directly into the Salesforce Output component properties.
Note
Steps to configure a Connected App vary depending on your Salesforce edition and release. Verify these steps against your own Salesforce org before following them.
- Navigate to the Salesforce Output website. Enter valid login credentials to continue. Click the account drop-down next to your Account name on the top-right corner of the page, then click Setup from the drop-down.
- Scroll down on the left to the Build section and click Create → Apps on the sidebar to open the Apps window.
- Scroll down to the Connected Apps section and click the New tab to open the New Connected App window.
- Fill in the Basic Information section: Connected App Name, API Name, and Contact Email.
-
In the API (Enable OAuth Settings) section, select the checkbox next to Enable OAuth Settings, then provide the following:
- Callback URL — this flow doesn't use the callback URL, but Salesforce requires a value. Enter a placeholder, such as
https://login.salesforce.com/services/oauth2/success. - Selected OAuth Scopes — select Manage user data via APIs (api), and any other scopes your job requires.
- Callback URL — this flow doesn't use the callback URL, but Salesforce requires a value. Enter a placeholder, such as
-
Select the checkbox next to Enable Client Credentials Flow.
- Under Run As, select a dedicated Salesforce integration user (not a personal user account) to define the identity the component authenticates as. This user must not have MFA enforced on their profile, since the Client Credentials flow doesn't complete an interactive login.
- Click Save, then, on the app's information page, click Manage and Edit Policies. Set Permitted Users to Admin approved users are pre-authorized, and assign the profile or permission set for your chosen Run As user.
-
In the API (Enable OAuth Settings) section, copy the codes next to Consumer Key and Consumer Secret. These correspond to the Client ID and Client Secret properties in the Salesforce Output component.
Note
Before the Consumer Secret can be copied, click Click to reveal to make it visible.
-
In Matillion ETL, on the Salesforce Output component, set Authentication Method to OAuth (Client Credentials), then enter the Client ID, Client Secret, and Login URL (your Salesforce instance URL, for example,
https://login.salesforce.comfor production orhttps://test.salesforce.comfor a sandbox).
Contact support🔗
If any help is needed configuring the Salesforce Output component for use in Matillion ETL, read Getting Support.