Connect to Amazon S3🔗
Matillion CDC can load data from your pipelines into an Amazon S3 bucket for storage. Follow the steps on this page to configure Amazon S3 as a destination.
Amazon S3 prerequisites🔗
To start using Amazon S3 as a destination, some requirements need to be met. These prerequisites ensure that a working connection can be set up to transfer data to your Amazon S3 bucket.
- An AWS account.
- Permissions to create and manage S3 buckets in AWS. Your AWS user must be able to create a bucket if one doesn't already exist, add/modify bucket policies, and upload files to the bucket.
- The IAM role used by the CDC agent container has
putObjectpermissions for the S3 bucket and its prefix to be used as the destination by the pipeline. - An active Amazon S3 bucket.
- A unique prefix name for each pipeline.
Connecting to Amazon S3🔗
Select Destination🔗
- After you configure the source during a CDC pipeline creation, you will be directed to choose a destination you would like to load your data into.
- In the Choose destination page, select Amazon S3.
Configure Amazon S3 Connection Settings🔗
Specify the following settings in the Connect to AmazonS3 Destination page:
| Property | Description |
|---|---|
| Bucket | This refers to the name of the Amazon S3 bucket you want to use as a destination. Find your bucket name in the AWS Management Console under Services → S3. |
| Prefix | Prefix is the name of the 'folder' or a location within the S3 bucket that all CDC data for this pipeline should be saved to. You can have multiple CDC agents using the same bucket with different prefixes. |
Note
A pipeline prefix must be unique.
Test Connection🔗
You can test your connection by clicking Test connection. If the test is successful, click Test and Continue.
Cross Account S3 access🔗
Given that you have a CDC agent set up in Account A, it's possible to load your change data into an S3 bucket in Account B.
To do this, you must configure the following access permissions for your CDC agent task role in your bucket policy.
- Allow
GetBucketLocationandListBucketon your bucket. - Allow
PutObject,GetObject, andDeleteObjecton the contents of your bucket.
An example bucket policy can be seen below:
{
    "Version": "2012-10-17",
    "Statement": [
        {
            "Sid": "Bucket Permissions",
            "Effect": "Allow",
            "Principal": {
                "AWS": "<account-a-agent-task-role-arn>"
            },
            "Action": [
                "s3:GetBucketLocation",
                "s3:ListBucket"
            ],
            "Resource": "<account-b-bucket-arn>"
        },
        {
            "Sid": "Bucket Content Permissions",
            "Effect": "Allow",
            "Principal": {
                "AWS": "<account-a-agent-task-role-arn>"
            },
            "Action": [
                "s3:PutObject",
                "s3:GetObject",
                "s3:DeleteObject"
            ],
            "Resource": "<account-b-bucket-arn>/*"
        }
    ]
}
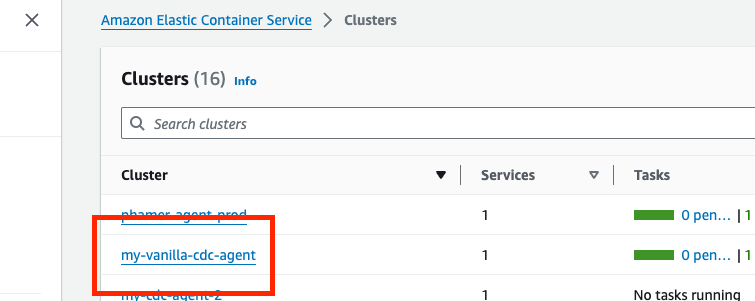
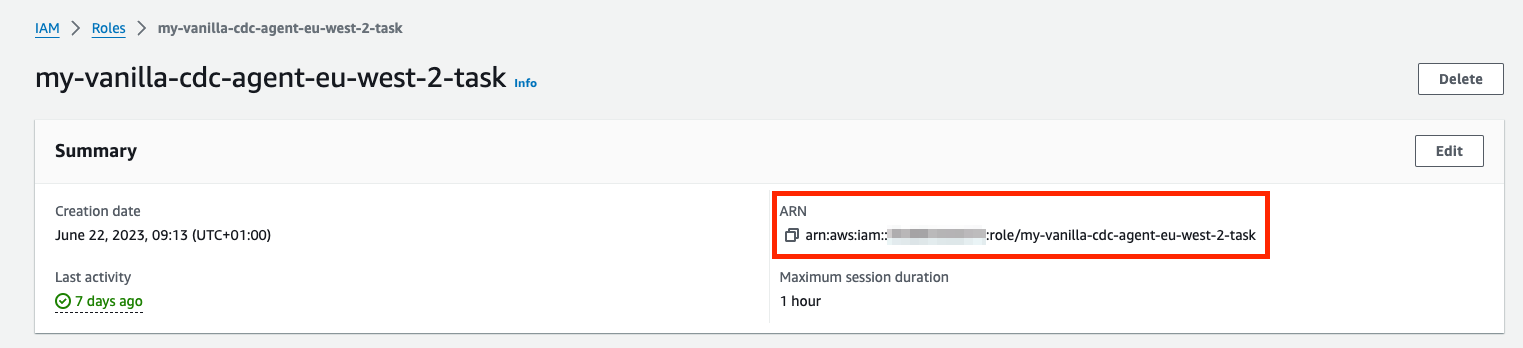
Your task role ARN can be found by navigating to your ECS clusters list (Account A) and following the steps below:
- In the search, type "ECS" and choose Elastic Container Service.
-
Select your ECS cluster.
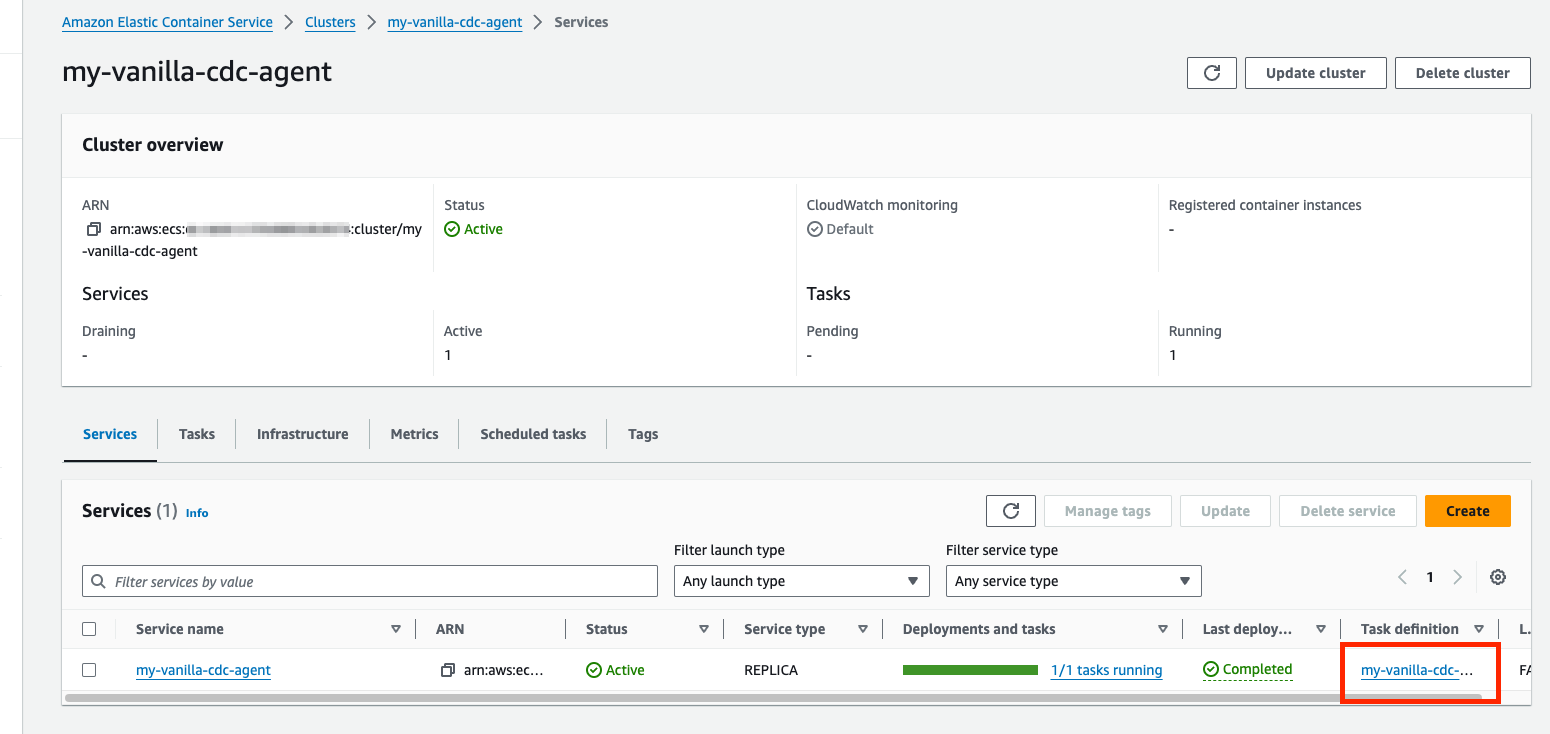
-
In the Services tab, locate and click your cluster's task definition.
-
In the Overview panel, locate and click the task role.
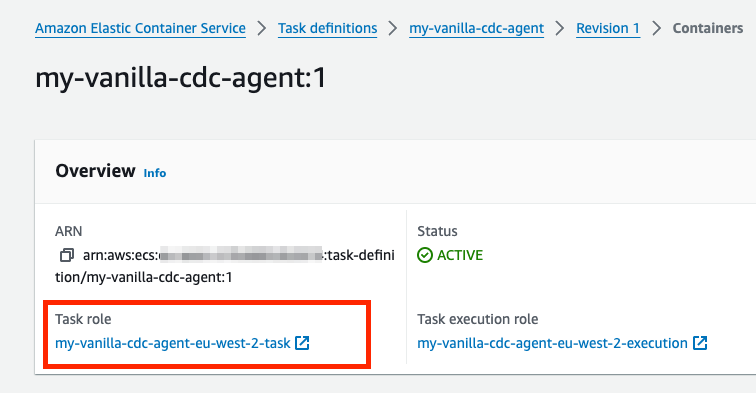
-
In the Summary panel, locate and copy your ARN.
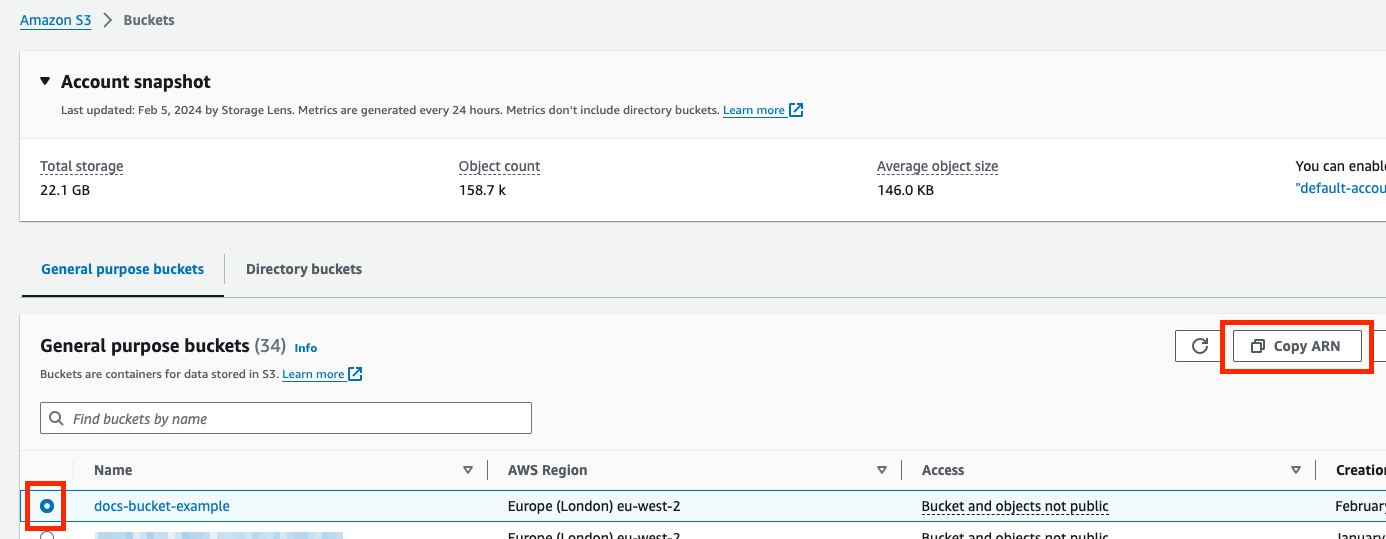
Similarly, your bucket ARN can be found by navigating to your S3 buckets list (Account B), selecting the corresponding radio button and clicking Copy ARN: