Using Git
In this example we'll show you how to use Git in Designer to demonstrate how source control on pipelines lets you collaborate without overwriting each other's work. The scenario documented below will show a pipeline that is worked on by several employees, all of whom are performing different tasks, who can manage their work using source control.
We'll be using a Google Sheet called CarInventory as the data source. The Google Sheet contains basic information about used cars for a team of sales people working at a second-hand car garage. Based on customer queries, they'll log on to their computers, use the pull remote changes command to receive the latest information about what cars are in stock, analyze the data, and add additional information to CarInventory, without overwriting each other's work, then commit and merge their changes to the main branch for future use.
CarInventory is being used as the data source in the Google Sheets Query component on the main branch of our project. We'll demonstrate a complete pipeline workflow in the main branch that the sales administrators at the car garage can use for their customer queries. As the manager in this example, we'll administer the updates on the main branch, and merge the changes when the workflow is complete.
We'll create our first branch called FilteringData before adding any pipelines to the main branch. This means prior to one of the sales administrators making any changes to their branch (otherwise this will cause merge conflicts), they will need to use the pull remote changes command from the main branch. They can then begin work on filtering CarInventory by mileage for customers that want to purchase a car with low mileage.
A second branch will be created called AddingCarData by another member of the sales team who wants to add a column to CarInventory displaying the color of the cars that are currently in stock, but doesn't want their colleague's work to be affected by the changes they are going to make. We'll demonstrate an alternative method to using the pull remote changes command to pull the latest version of the main branch, by making a copy of the main branch on creation of the AddingCarData branch.
Note
Using Git in Designer means you don't have a copy of the files on your local machine. You'll have an online copy of the remote repository. This will be your working directory, where all changes are staged until you commit and push to the remote repository.
Getting started
When you register to the Data Productivity Cloud an account and warehouse will be set up for you. Designer will open, where a default project called My first project-default will already be displayed, ready for you to begin. If you aren't newly registered, and you want to create a new project to work in, read Projects for more information.
Whether you're newly registered to the Data Productivity Cloud or an existing customer, when a project is created an associated Matillion-hosted Git repository is created with a default branch called main. This is where we'll add our orchestration and transformation pipelines. Other branches we'll create later will use the pull remote changes git command to obtain the latest version of the main branch.
Main branch
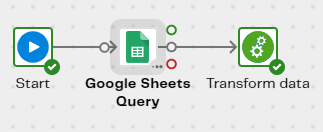
In the main branch we've added an orchestration pipeline that uses the Google Sheets Query component to retrieve the data from our CarInventory Google Sheet. We've added an appropriate name for the Target Table parameter. For the purpose of this example, we've called it GetCarInventory. We'll need to reference this name later when we want to load the spreadsheet data in to a table. We want to display this data in a transformation pipeline, which we'll create now, so we can reference its name in our orchestration pipeline, using the Run Transformation component, which we'll call "Transform data". Make sure you validate and run the pipeline to make sure your implementation is correct.
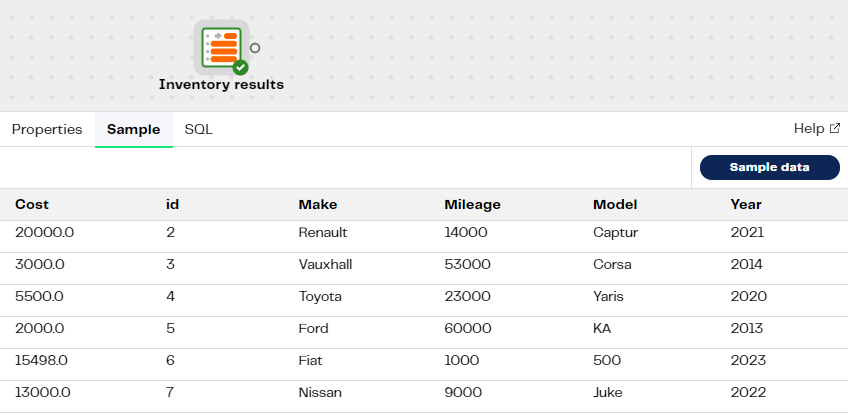
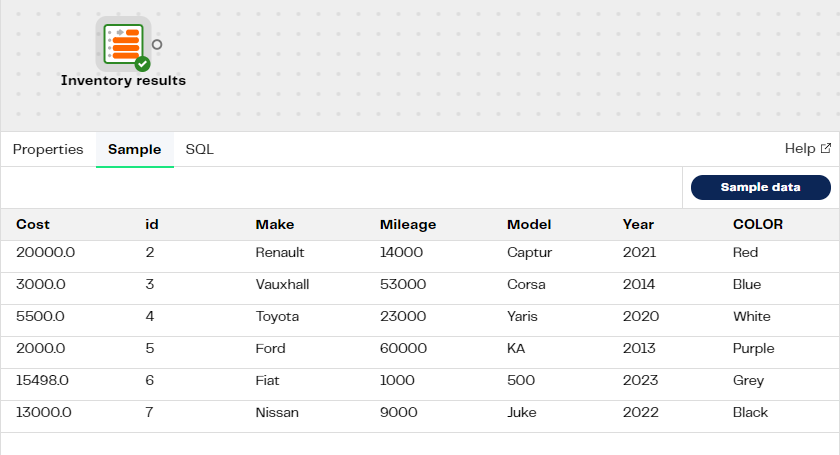
In the transformation pipeline we've just created, we'll use the Table Input component, which we'll call "Inventory results" to read columns from the target table name we called GetCarInventory earlier in our orchestration pipeline. Validate and run the pipeline. Sample the data to see a list of cars that are in stock.
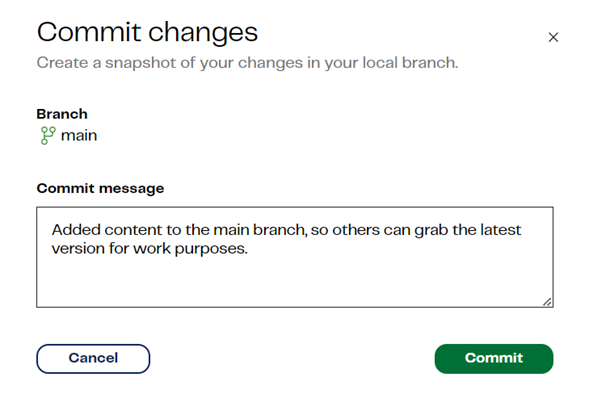
Now we have a complete workflow on the main branch, Commit your changes to the local branch.
To allow other team members to access these changes, you now need to Push local changes to the remote repository.
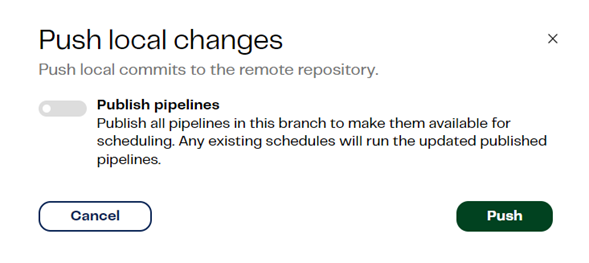
For the purpose of this example, we don't need to publish our pipelines, so leave this option de-selected.
Other users can now see these changes after they use the Pull remote changes command.
Let's merge our changes from main to the first branch we created earlier, called FilteringData:
- Click Merge to open the Merge changes into another branch dialog.
- Select FilteringData from the Branch to merge into drop-down menu.
- Add an appropriate Merge commit message in the field provided.
- Click Merge.
Filtering the data
Before work begins in the FilteringData branch, the changes need to be pulled from the main branch, updating our working directory version of the code. In the FilteringData branch, click Pull remote changes. A copy of the contents in main will now be available in FilteringData.
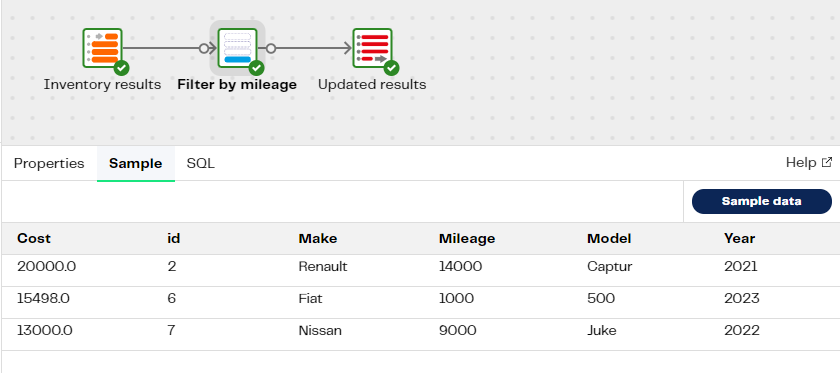
The purpose of this branch is to filter the results of the CarInventory Google Sheet by mileage for customer queries. We'll open the transformation pipeline we created earlier in main, and apply a Filter, which we'll call "Filter by mileage" to the Table Input component called "Inventory results" we added earlier, that sets conditions to only return cars on the system with less than "15000" miles on the clock. We'll use the [Table Output][/data-productivity-cloud/designer/docs/table-output/] component, which we'll call "Updated results" to store the filtered data in the original table by using the target table name GetCarInventory again, as the target table. Validate and Run the pipeline, then Sample the filtered results.
You'll notice as soon as you make changes on this (or any other) branch, an "i" icon will appear next to the Git button in Designer. This is a notification that lets you know you have uncommitted changes on this branch, which is what we're expecting, since we have made changes. For this example, we don't want to commit these changes to the remote (main) branch because this particular task is investigative and doesn't require main to be updated at this time.
Adding data
Create your second branch and call it AddingCarData. Your branch name must be unique. Make sure you create the branch from main, and select your default environment. In this case it will be the default project, called My first project-default. Click Create.
As this branch is being created before changes have been committed and pushed on the FilteringData branch earlier, this new branch won't include any work that has been done on FilteringData. In this branch, Pull remote changes from main. We'll add a new column to the original table we created in Main branch to display the color of the cars that are currently in stock.
You'll see the pipelines we created in main earlier, displayed in the Files panel of the Designer UI. This means you're ready to begin making changes on your branch. We'll add a new column called "COLOR" to the CarInventory Google Sheet, then push these changes to main, updating the remote branch. Other branches in this example, and ones that may be created in the future, can use the Pull remote changes command from main to get the most up-to-date information in their branch, and work independently from the rest of the sales team, without any disruption to their own branch.
In our orchestration pipeline, we'll add the SQL Script component to our workflow, which we'll call "Add data". Use the following SQL commands to add a new column called "COLOR" and new rows with the following values:
ALTER TABLE "[database]"."[schema]"."[tablename]"
ADD COLOR VARCHAR;

UPDATE "[database]"."[schema]"."[tablename]"."[column]"
SET COLOR = 'Red'
WHERE t1."id" = 2;

UPDATE "[database]"."[schema]"."[tablename]"."[column]"
SET COLOR = 'Blue'
WHERE t1."id" = 3;

UPDATE "[database]"."[schema]"."[tablename]"."[column]"
SET COLOR = 'White'
WHERE t1."id" = 4;

UPDATE "[database]"."[schema]"."[tablename]"."[column]"
SET COLOR = 'Purple'
WHERE t1."id" = 5;

UPDATE "[database]"."[schema]"."[tablename]"."[column]"
SET COLOR = 'Grey'
WHERE t1."id" = 6;

UPDATE "[database]"."[schema]"."[tablename]"."[column]"
SET COLOR = 'Black'
WHERE t1."id" = 7;
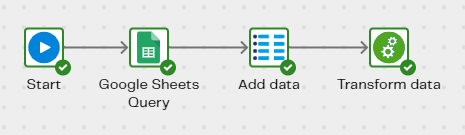
Validate and Run your orchestration pipeline. Your new workflow will look something like this:
Switch to the transformation pipeline. In the Column Names property, click the cog icon to open the Column Names dialog. Move the new column name COLOR over to the Selected Column Names section to join the other column names in the list. Click Save. Validate and Run the pipeline, and Sample the data. You will see the new "COLOR" column, and the values that have been added to the GetCarInventory target table.
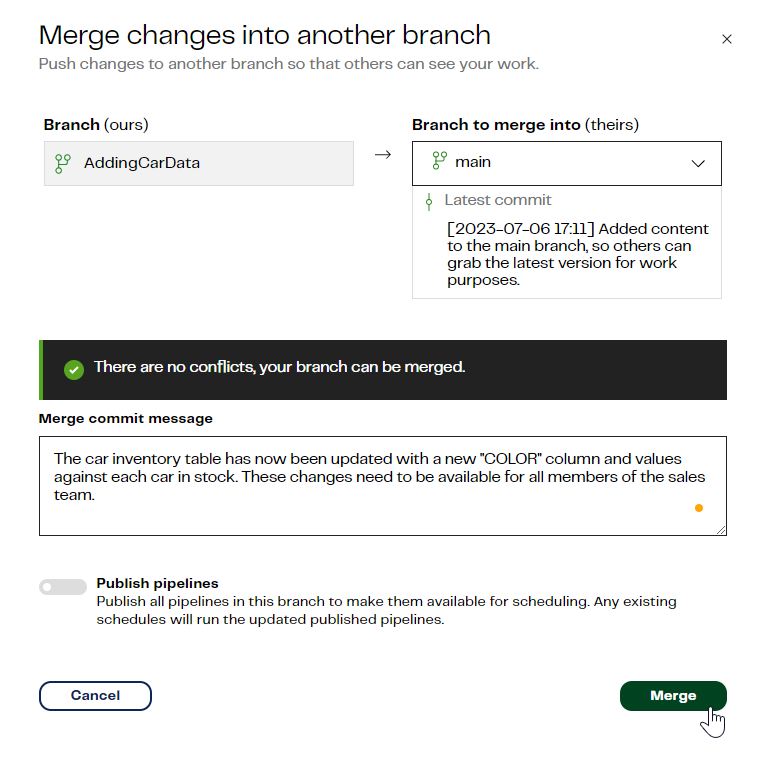
Now our workflow is complete on the AddingCarData branch, we need to commit and push these changes to main. Click Commit, and enter an appropriate message for it, and then click Push local changes so that changes will be pushed to the remote branch. To confirm the push, Merge them to main.
Switch to the main branch, click Pull remote changes to see the latest updates in main. Colleagues who have active branches, such as the FilteringData branch we created earlier, will need to click Pull remote changes if they want to see the latest updates to the GetCarInventory target table.
Got feedback or spotted something we can improve?
![]() We'd love to hear from you. Join the conversation in the Documentation forum!
We'd love to hear from you. Join the conversation in the Documentation forum!