Launching Matillion ETL for GCP
Launch Matillion ETL on GCP for Snowflake and BigQuery using the GCP console, then associate your Matillion ETL instance to complete the process in the Hub. Customers launching GCP instances via the Hub can pay for their instances with credits allocated to their Hub account.
Note
If you're on the Credit Based Trial, you won't be able to associate your Matillion ETL instance. To do this, you're required to upgrade to a paid subscription. For more information, read Manage subscription.
Prerequisites
- Make sure you have the correct permissions to create virtual machines (VMs) in your GCP Project.
- Hub-billed images are not publicly accessible. You will need to contact Matillion support to authorize any required images.
Launching your Matillion ETL instance on GCP
Follow these steps to launch your Matillion ETL instance via the GCP console:
- Log in to the GCP console.
- Select your project.
- Type "VM instances" in to the search bar at the top, and in the search results, select VM instances.
- A list of VM instances will be displayed. Click Create Instance at the top.
- Scroll down the page, and click CHANGE under Boot disk.
- The Boot disk dialog will open in the PUBLIC IMAGES tab, switch to the CUSTOM IMAGES tab instead.
- Click CHANGE next to Source project for images. Set it to "Matillion ETL for BigQuery". This is one of Matillion's public projects. Click OPEN.
- The dialog will close, and you'll return to the Boot disk dialog. Use the Image drop-down menu to search for one of the available images.
-
Use the filter, and type in "bp", this stands for billing project. Select your version from the list, and all images will be displayed.
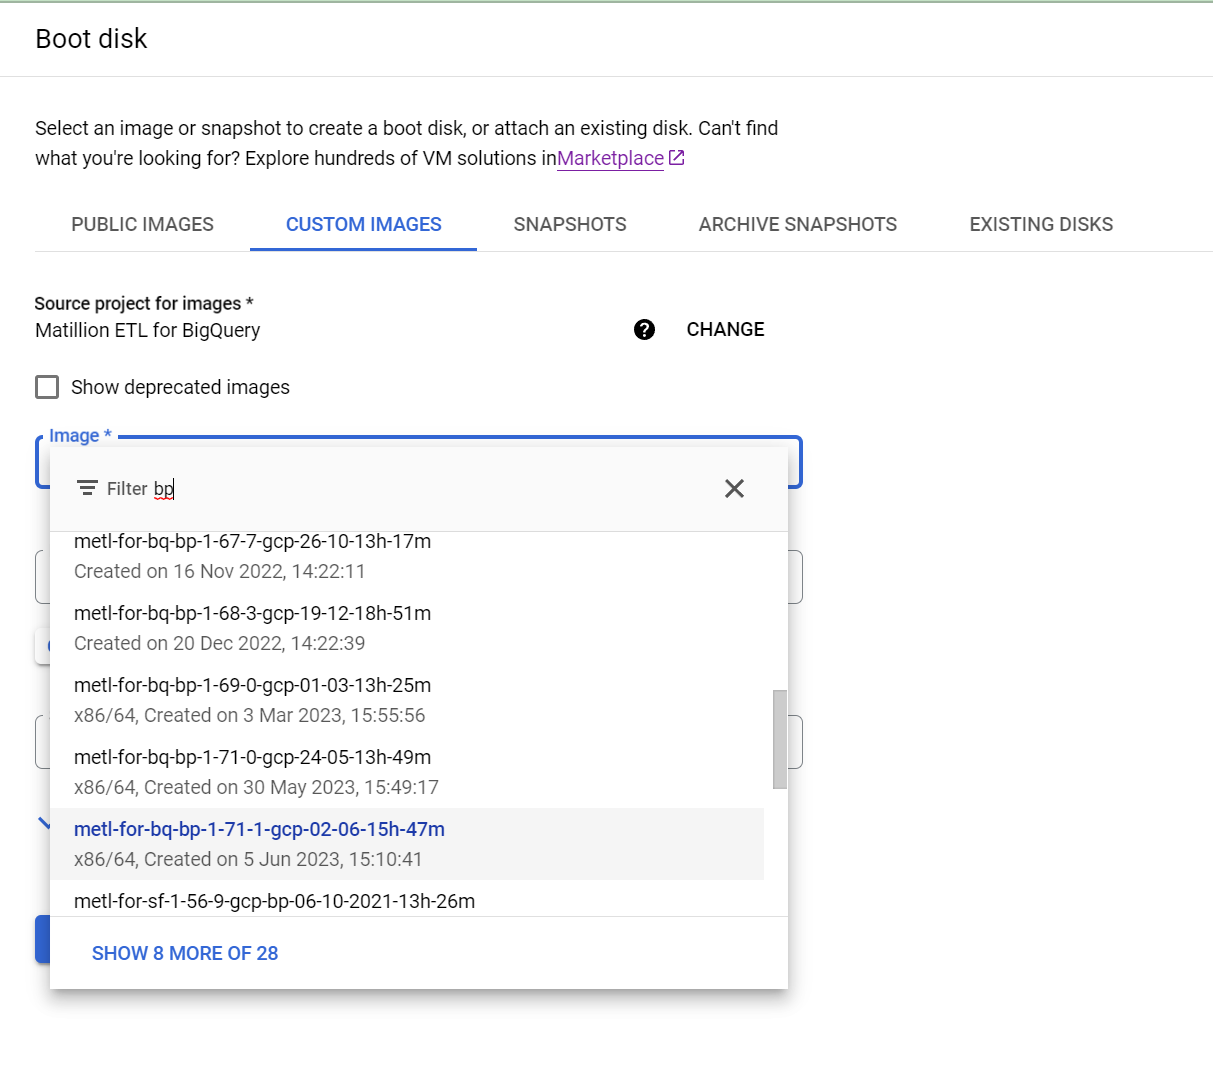
-
Click SELECT.
- Click Create. It will take a few minutes for your Matillion ETL instance to be configured.
- You'll be redirected to your launched Matillion ETL instance. Click Associate Instance to associate your Matillion ETL instance with your Hub account. You will be prompted to log in.
- When you successfully log in to the Hub, choose the account in which you want to associate your Matillion ETL instance.
- Give your instance a name, and click Associate. For more information, read Associating a Matillion ETL instance
- Click Launch Matillion ETL.